BTW, Im coining this DIY as the Raquel Shred Shirt. Wanna know why? Cause Im sick of calling it DIY 500 dollar wannabe, childhood flames did it, etc.
What youll need:
-seam ripper-plain white tee
-scissors (or, if your like Wolverine you can use your nails)
-soooo much time (think about it. twice)

Lets get started:
Take your scissors and cut off the hem of the shirt, the slightly thicker strip along the bottom of your tee. Youll have a long band, or a cut up band, when youve cut it all off.
(see second picture below)
You can use the band for a very stylish bracelet, or throw it out in the trash with the vintage duds you bought at goodwill and realized were incredibly tacky.
(see second picture below)
You can use the band for a very stylish bracelet, or throw it out in the trash with the vintage duds you bought at goodwill and realized were incredibly tacky.


Next:
Stretch the shirt a bit (this will help in getting the thread loose.) Take the seam ripper and locate the bottom of the tee. Start pulling at the threads that are horizantal. If you break a few, that is okay. I probably have broken 1349287342 threads in my tshirt. But I say that adds character, so youre okay. Youll find that the threads are all connected, and the more your pull (without breaking), the longer your thread is running horizantally, the bigger your shredded section will be.


Next:
When youve got the length of thread to be the size youd like, take the thread right beneath it (still woven into the tshirt), and do the same thing. Pull the thread to be as long as the thread above it. Repeat. Keep going up until the section is as tall as you want it to be.
Recomendation: I seriously think that you should stretch the shirt often. It makes the threads easier to get out without breaking. Seriously. Itll make your DIY just. that. easier.


Next:
Repeat until you have the desired amount of sections and tallness. Youre done!
Now tell me, that wasn't so hard, right? (Basic sarcasm embedded into last sentence. It took me 3o minutes to get the first section started. Yes. I mean to get the first thread not to break in order to start the column upwards.)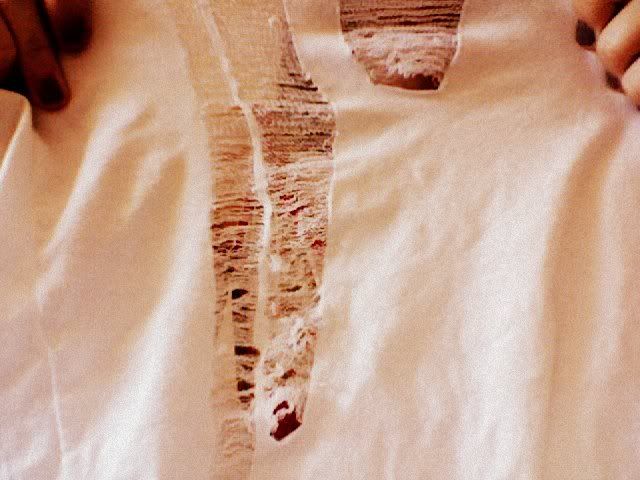
I still havent finished mine, oh well. Ill post pictures asap, though I think you already knew that.
Now tell me, that wasn't so hard, right? (Basic sarcasm embedded into last sentence. It took me 3o minutes to get the first section started. Yes. I mean to get the first thread not to break in order to start the column upwards.)

I still havent finished mine, oh well. Ill post pictures asap, though I think you already knew that.
0 comments:
Post a Comment